1_[spring]put api 작성하기
PUT API 작성하기
- 리소스 갱신, 생성( POST API: 리소스 생성, 추가 C) ▶️ C/U
- 데이터 하나에 대해서 생성하고 업데이트 하기 때문에 멱등함!
- 잘못된 데이터가 있더라도 update시키기 때문에 안정성은 없음
- Path Variable을 이용할 수 있고, Query Parameter를 가지지 않는 것이 조금 더 바람직함(Data Body로 데이터를 전송하기 때문)
- PutMapping(Put resource 설정)과 함께 RequestBody(Request Body 부분 Parsing)를 이용(DataBody가 있기 때문!)
이번 API 공부에는 아래와 같은 형태로
{
	"name":"사용자 이름",
	"age" : 20,
	"car_list":[
		{
			"name":"자동차이름",
			"car_number":"11가 1234"
		},
		{
			"name":"자동차이름",
			"car_number":"11가 1235"
		}

	]
}
사용자 정보를
- 사용자 이름
- 사용자 나이
- 자동차 리스트- 자동차 이름과 차량번호 로 구성된 객체 리스트
로 받는다고 생각해보자
그렇다면 이 api는 사용자 차량 등록 정보 api가 될 수 있을 것 같다!
그래서 자바에서는 총 2개의 dto 객체를 준비해줄 필요가 있다
- PostRequestDto - 사용자 dto
- CarDto - 자동차 dto
package com.put_api.put_api.controller.dto;

import com.fasterxml.jackson.annotation.JsonProperty;

import java.util.List;

public class PostRequestDto {

    private String name;
    private int    age;
    @JsonProperty("car_list")
    private List<CarDto> carList;

    public PostRequestDto() {
    }

    public PostRequestDto(String name, int age, List<CarDto> carList) {
        this.name = name;
        this.age = age;
        this.carList = carList;
    }

    public String getName() {
        return name;
    }

    public void setName(String name) {
        this.name = name;
    }

    public int getAge() {
        return age;
    }

    public void setAge(int age) {
        this.age = age;
    }

    public List<CarDto> getCarList() {
        return carList;
    }

    public void setCarList(List<CarDto> carList) {
        this.carList = carList;
    }

    @Override
    public String toString() {
        return "PostRequestDto{" +
                "name='" + name + '\'' +
                ", age=" + age +
                ", carList=" + carList +
                '}';
    }
}
package com.put_api.put_api.controller.dto;

import com.fasterxml.jackson.annotation.JsonProperty;

public class CarDto {
    private String name;
    @JsonProperty("car_number")
    private String carNumber;

    public CarDto() {
    }

    public CarDto(String name, String carNumber) {
        this.name = name;
        this.carNumber = carNumber;
    }

    public String getName() {
        return name;
    }

    public void setName(String name) {
        this.name = name;
    }

    public String getCarNumber() {
        return carNumber;
    }

    public void setCarNumber(String carNumber) {
        this.carNumber = carNumber;
    }

    @Override
    public String toString() {
        return "CarDto{" +
                "name='" + name + '\'' +
                ", carNumber='" + carNumber + '\'' +
                '}';
    }
}
package com.put_api.put_api.controller;

import com.put_api.put_api.controller.dto.PostRequestDto;
import org.springframework.web.bind.annotation.PutMapping;
import org.springframework.web.bind.annotation.RequestBody;
import org.springframework.web.bind.annotation.RequestMapping;
import org.springframework.web.bind.annotation.RestController;

@RestController
@RequestMapping("/api")
public class PutApiController {

    @PutMapping("/put")
    public void put(@RequestBody PostRequestDto dto){
        System.out.println(dto);
    }

}
먼저, json은 snake case를 사용하기 때문에 매칭을 시켜줄 필요가 있어서 JsonProperty를 이용해서 해당 필드를 매칭해주었다(매칭시키지 않으면 carList=null로 출력될 수 있다)
그리고 POST API 기본 형태처럼 PutMapping으로 주소를 매핑해주고
DataBody를 이용하기 때문에 RequestBody에 dto 객체를 실어준다
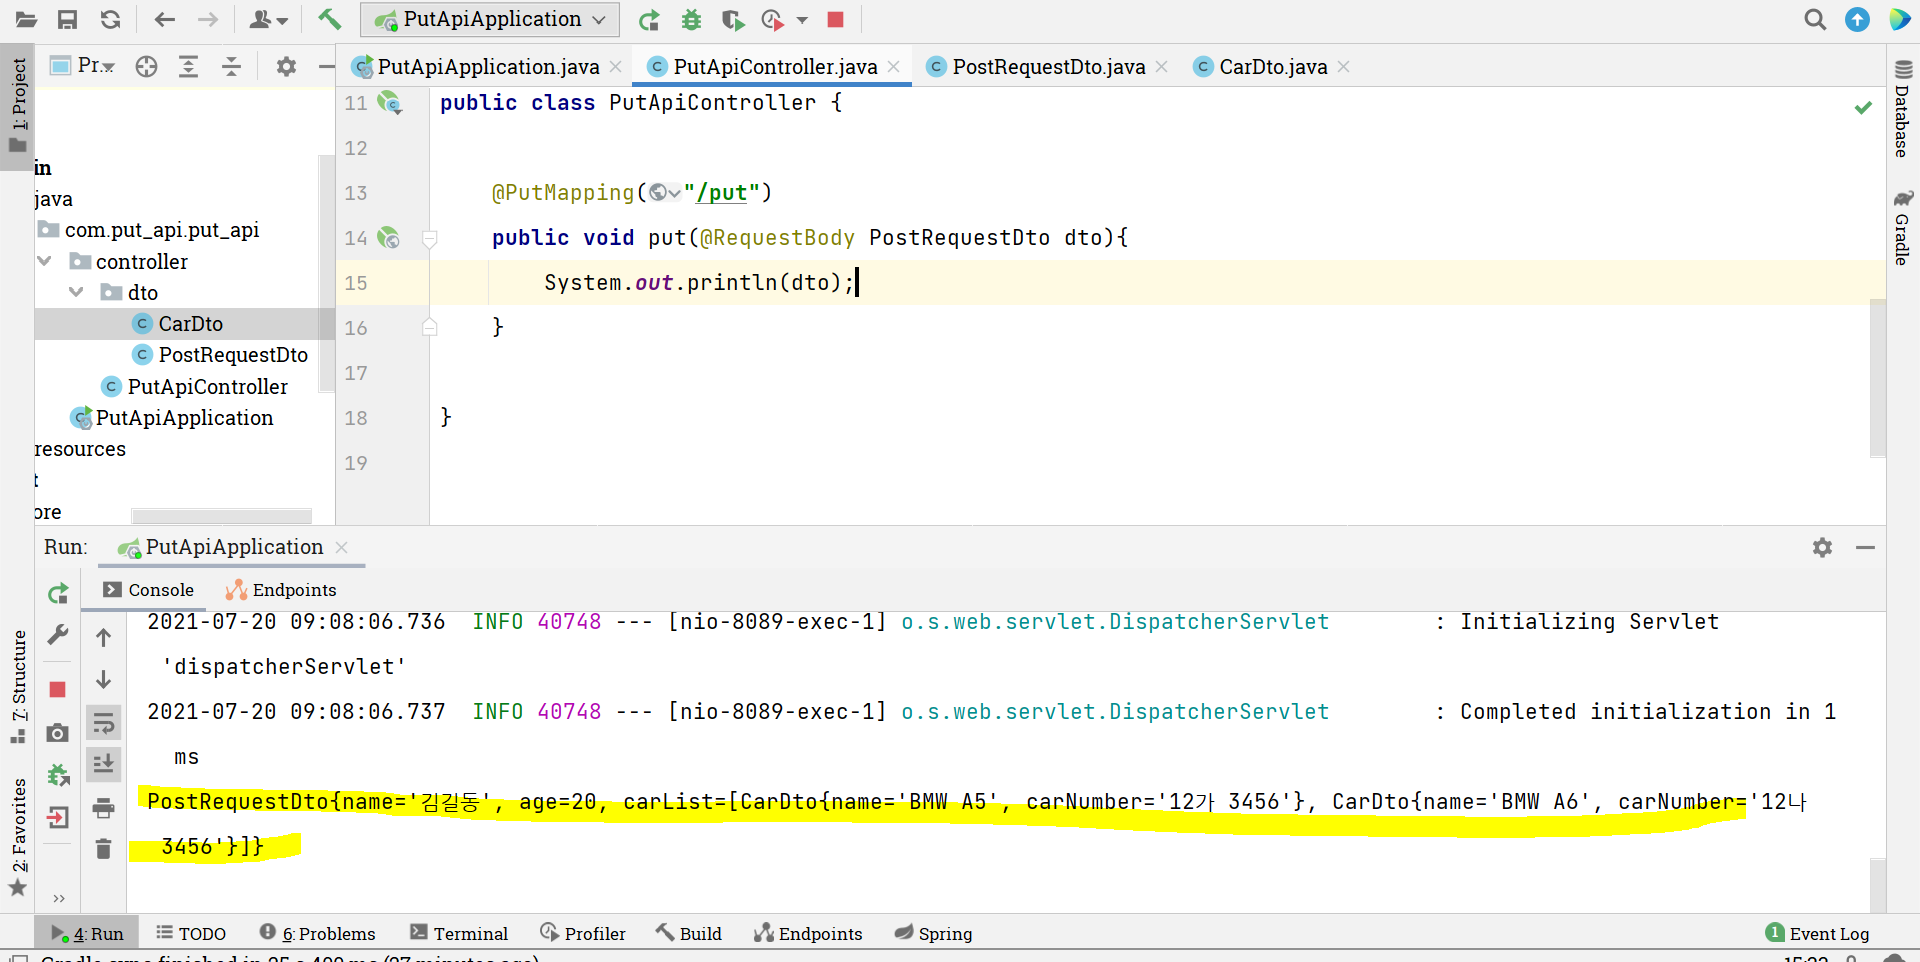
그렇게 되면 talend에서도 200 상태를 확인할 수 있고, 콘솔에서 넘어온 데이터를 확인해볼 수 있다!
🌟만약 데이터를 실어보내지 않는다면 talend에서는 400 에러와 함께 연결이 종료되었다라는 메시지(connection close)를 확인해볼 수 있을 것이다
이때 서버 콘솔에서는 아래와 같은 메시지를 확인해볼 수 있을 것이다
2021-07-20 09:15:42.499 WARN 40748 — [nio-8089-exec-4] .w.s.m.s.DefaultHandlerExceptionResolver : Resolved [org.springframework.http.converter.HttpMessageNotReadableException: Required request body is missing: public void com.put_api.put_api.controller.PutApiController.put(com.put_api.put_api.controller.dto.PostRequestDto)]
📌 위의 JsonProperty가 아닌 JsonNaming을 이용해서 객체 전체에 네이밍 차이를 매칭시켜주는 방법
@JsonNaming(value=PropertyNamingStrategy.SnakeCaseStrategy.class)
위와 같이 JsonNaming어노테이션의 value값을 PropertyNamingStrategy.SnakeCaseStrategy.class로 설정해주면 매번 필드마다 설정해주지 않아도 된다! 한번 바꿔보자!
package com.put_api.put_api.controller.dto;

import com.fasterxml.jackson.annotation.JsonProperty;
import com.fasterxml.jackson.databind.PropertyNamingStrategy;
import com.fasterxml.jackson.databind.annotation.JsonNaming;

import java.util.List;

**@JsonNaming(value= PropertyNamingStrategy.SnakeCaseStrategy.class)**
public class PostRequestDto {

    private String name;
    private int    age;
    private List<CarDto> carList;

    public PostRequestDto() {
    }

    public PostRequestDto(String name, int age, List<CarDto> carList) {
        this.name = name;
        this.age = age;
        this.carList = carList;
    }

    public String getName() {
        return name;
    }

    public void setName(String name) {
        this.name = name;
    }

    public int getAge() {
        return age;
    }

    public void setAge(int age) {
        this.age = age;
    }

    public List<CarDto> getCarList() {
        return carList;
    }

    public void setCarList(List<CarDto> carList) {
        this.carList = carList;
    }

    @Override
    public String toString() {
        return "PostRequestDto{" +
                "name='" + name + '\'' +
                ", age=" + age +
                ", carList=" + carList +
                '}';
    }
}
package com.put_api.put_api.controller.dto;

import com.fasterxml.jackson.databind.PropertyNamingStrategy;
import com.fasterxml.jackson.databind.annotation.JsonNaming;

**@JsonNaming(value= PropertyNamingStrategy.SnakeCaseStrategy.class)**
public class CarDto {
    private String name;
    private String carNumber;

    public CarDto() {
    }

    public CarDto(String name, String carNumber) {
        this.name = name;
        this.carNumber = carNumber;
    }

    public String getName() {
        return name;
    }

    public void setName(String name) {
        this.name = name;
    }

    public String getCarNumber() {
        return carNumber;
    }

    public void setCarNumber(String carNumber) {
        this.carNumber = carNumber;
    }

    @Override
    public String toString() {
        return "CarDto{" +
                "name='" + name + '\'' +
                ", carNumber='" + carNumber + '\'' +
                '}';
    }
}
위와 같이 변경해주면 지금은 차이를 못느낄 수 있겠지만, (동일한 결과를 내기 때문) 필드 갯수를 확장시키면 진가를 발휘할 수 있을 것이다![일괄변경의 장점!!]
❓ response를 내려주는 방법 ❓
RestController는 객체 자체를 리턴해주면 스프링 부트에서 ObjectMapper에서 자동으로 json객체로 변환해준다!
package com.put_api.put_api.controller;

import com.put_api.put_api.controller.dto.PostRequestDto;
import org.springframework.web.bind.annotation.PutMapping;
import org.springframework.web.bind.annotation.RequestBody;
import org.springframework.web.bind.annotation.RequestMapping;
import org.springframework.web.bind.annotation.RestController;

@RestController
@RequestMapping("/api")
public class PutApiController {

    @PutMapping("/put")
    public PostRequestDto put(@RequestBody PostRequestDto dto){
        System.out.println(dto);
        return dto;
    }

}
위와 같이 객체를 반환해주면

talend에서도 내가 보냈던 데이터를 그대로 json 형태의 데이터로 확인해볼 수 있다!
🌟 스프링부트, 특히 RestController에서는
- Object를 리턴하고
- 거기에서 notation에 따라서 JsonNaming이라던지 JsonProperty를 이용하여 이름을 매칭해주면
그 rule에 따라서 해당 이름에 대한 값을 response에서는 json형태로 받아볼 수 있다!
- PathVariable도 GET, POST와 같이 사용할 수 있다!
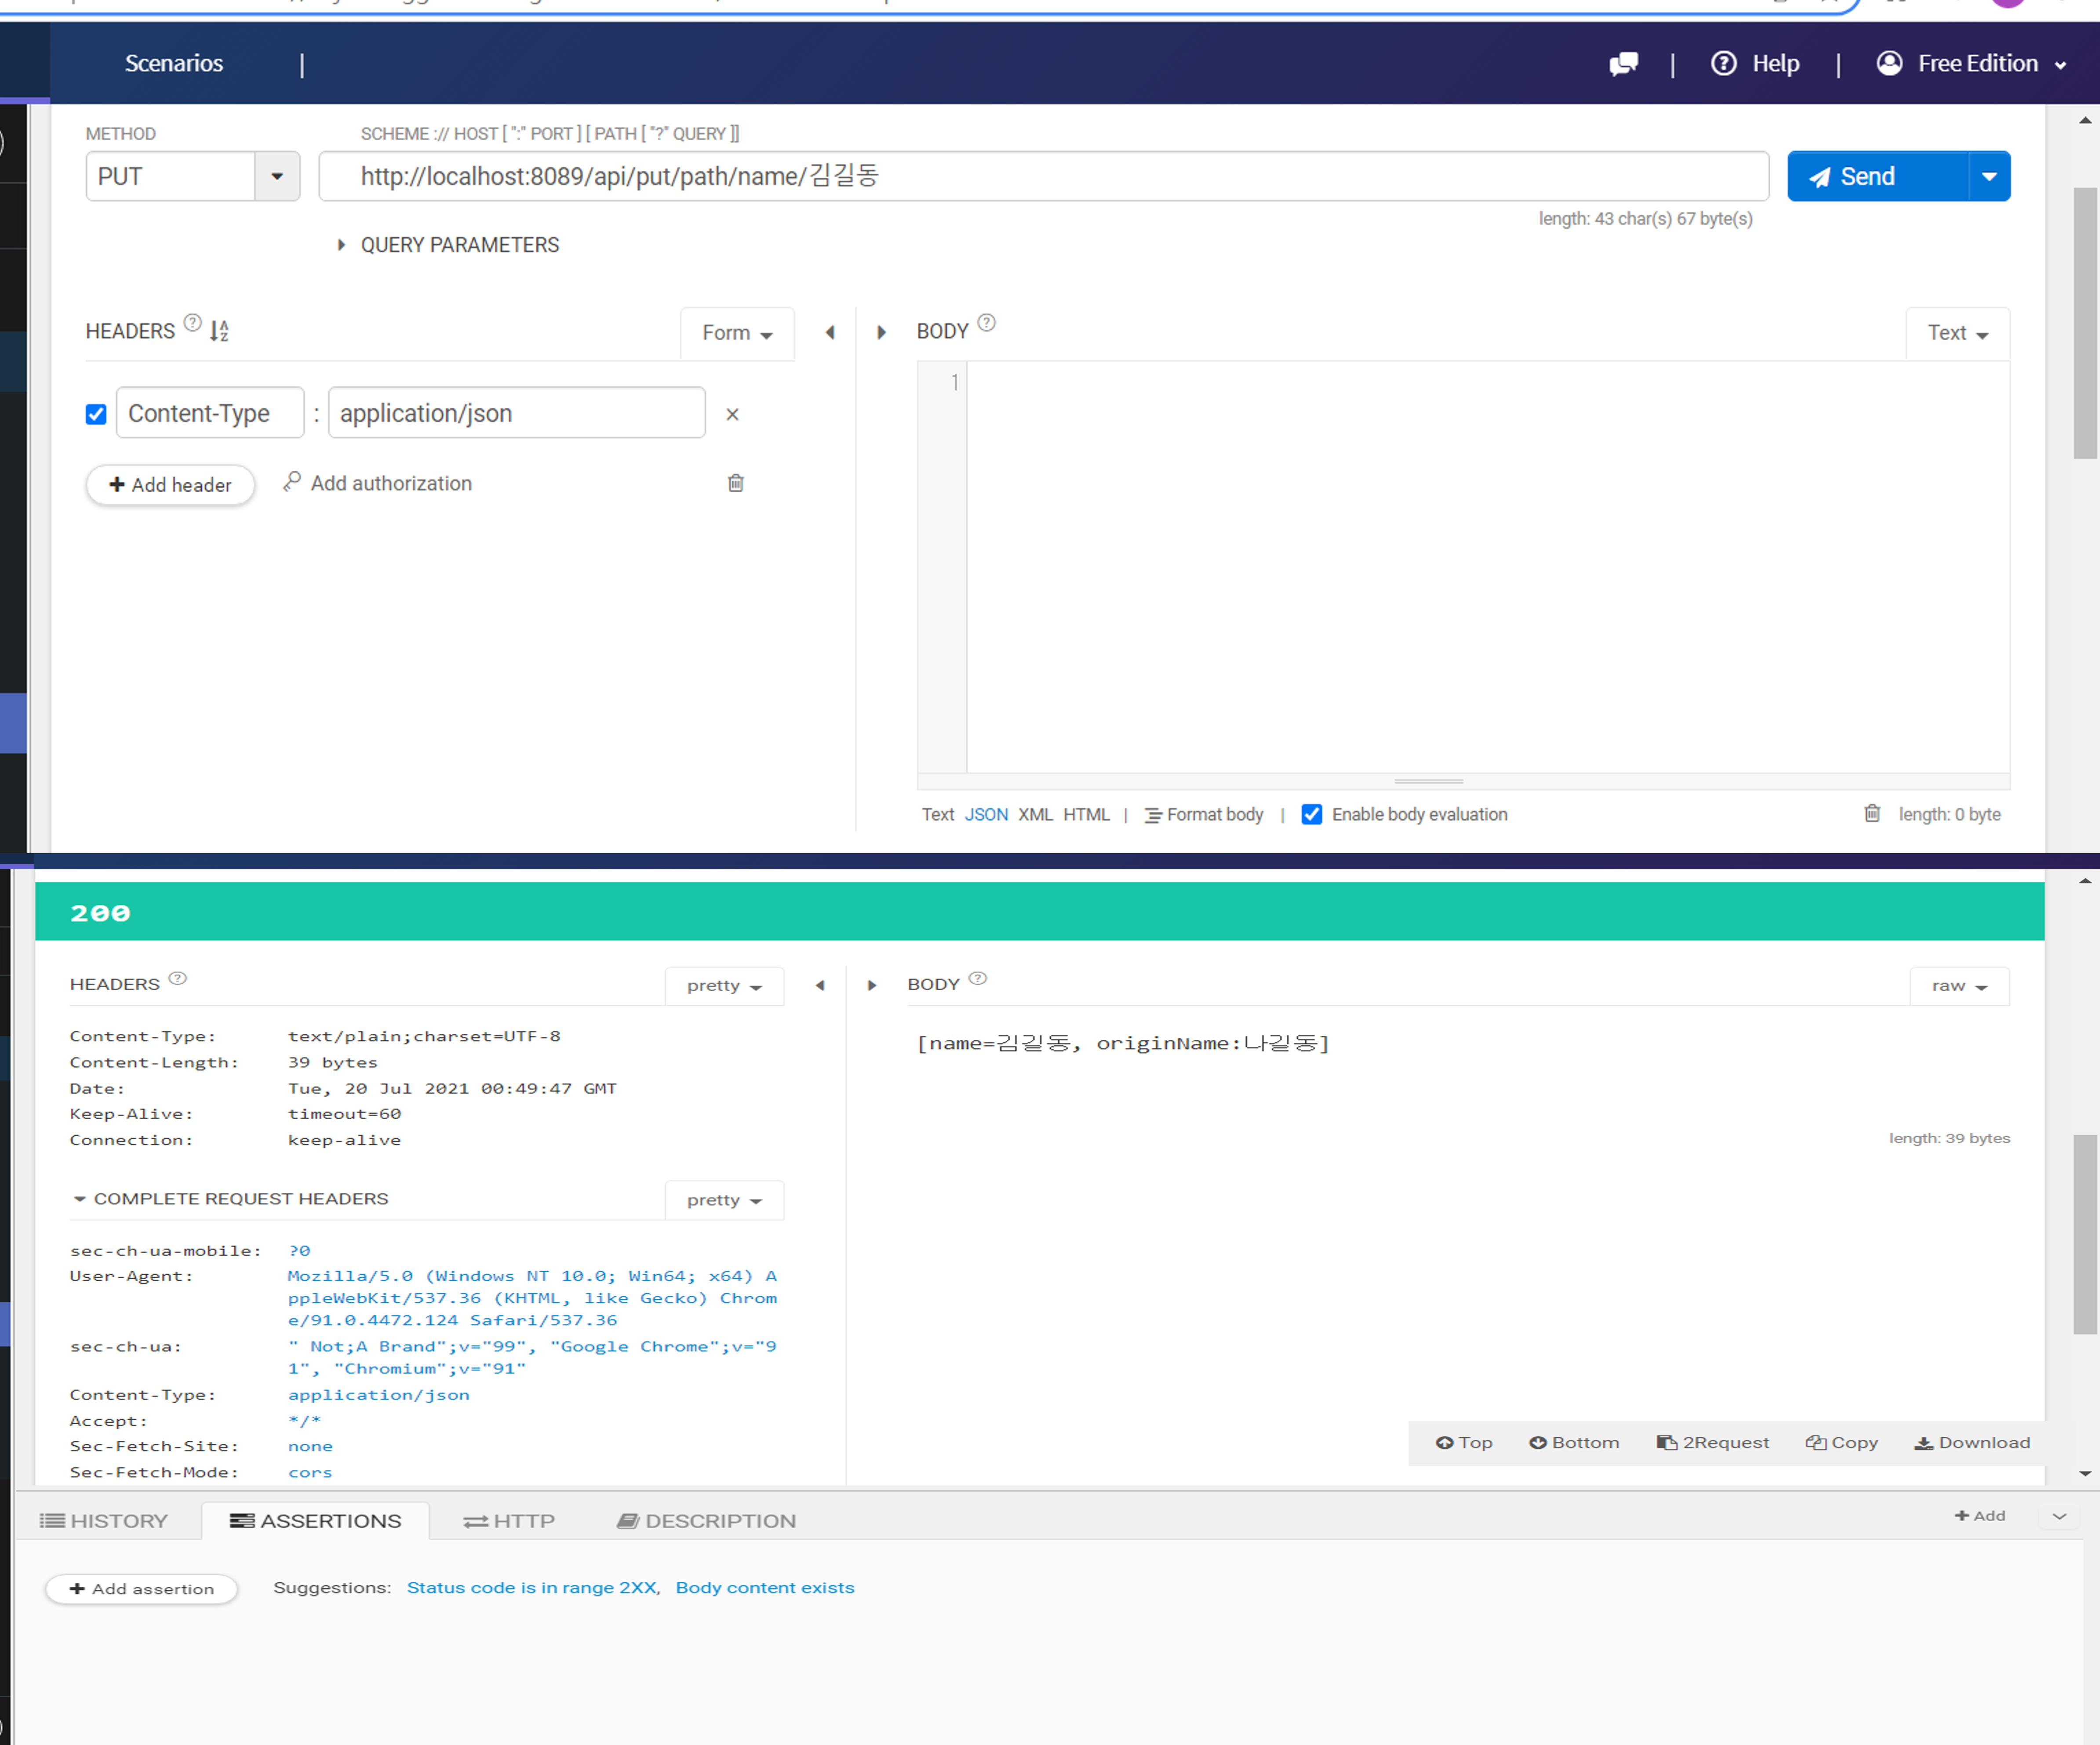
나는 저번에 학습한 것 중 같은 이름으로 충돌될 수 있을 때를 간단하게 시험해보기 위해서 아래처럼 name속성을 설정해주었다
@PutMapping("/put/path/name/{name}")
    public String pathName(@PathVariable(name="name")String pathName, String name){
        StringBuilder sb = new StringBuilder();
        name = "나길동";
        sb.append("[name="+pathName+", originName:"+ name+"]\n");
        return sb.toString();
    }
그러면 아래와 같이 응답을 확인해볼 수 있다!
📌 상기📌
- RestController: REST API 설정
- RequestMapping : 리소스 설정(메서드로 구분 가능-ex— @RequestMapping(path=”/hi”, method= RequestMethod.GET)
- PathVariable : URL path variable parsing