1_[css]background
CSS-배경 속성
- background
- 요소의 배경을 설정
- 단축, 개별 속성 지원
[USAGE]
background: 색상 이미지링크 반복 위치 스크롤특성;
🌟 위에서 위치 값에 따라서 내부의 이미지 위치가 영향을 받을 수 있다!
<!DOCTYPE html>
<html lang="ko">
<head>
    <meta charset="UTF-8">
    <meta http-equiv="X-UA-Compatible" content="IE=edge">
    <meta name="viewport" content="width=device-width, initial-scale=1.0">
    <title>Document</title>
    <style>
        div{
            margin-bottom:30px;
        }
        .back1{
            width: 500px;
            height: 500px;
            color:blue;
            font-weight: bold;
            background:lightgreen url("https://heropy.blog/css/images/logo.png") no-repeat left 10px top 10px scroll;
        }
        .back2{
            width: 500px;
            height: 500px;
            background:url(https://heropy.blog/css/images/logo.png) no-repeat top;
        }
        .back3{
            width: 500px;
            height: 500px;
            background:lightsalmon;
        }
    </style>
</head>
<body>
    <div class="back1">색상 이미지경로 반복 위치 스크롤 특성</div>
    <div class="back2">이미지경로 반복 위치 </div>
    <div class="back3">색상</div>
</body>
</html>

CSS- background 속성
위에서 확인해본 것처럼, 모든 옵션을 다 사용하게 되면 png 이미지를 활용한 경우, 특정 배경색을 지닌 사진처럼 보일 수도 있다! 또한, 뿐만 아니라 일부 속성은 제외하고 사용할 수도 있음을 알 수 있다
- background-color
- (개별속성) 요소의 배경 색상을 지정
<!DOCTYPE html>
<html lang="ko">
<head>
    <meta charset="UTF-8">
    <meta http-equiv="X-UA-Compatible" content="IE=edge">
    <meta name="viewport" content="width=device-width, initial-scale=1.0">
    <title>Document</title>
    <style>
        .left{
            float:left;
            margin-left:5px;
        }
        .clearfix::after{
            content:"";
            clear:both;
            display:block;
        }
        .div1{
            width: 200px;
            height: 200px;
            background-color: transparent;
            border:1px solid;
        }
        .div2{
            width: 200px;
            height: 200px;
            background-color: lightskyblue;
            border:1px solid;
        }
        .div3{
            width: 200px;
            height: 200px;
            background-color: rgba(200,200,200,.5);
            border:1px solid;
        }
    </style>
</head>
<body>
    <div class="container clearfix">
        <div class="div1 left">transparent</div>
        <div class="div2 left">color1</div>
        <div class="div3 left">color2</div>
    </div>
</body>
</html>
background-color
위와 같이 기존의 색상을 지정하는 방법을 이용해서 색상을 넣을 수도 있고, 혹은 요소의 배경을 투명하게 만들 수도 있음을 확인해볼 수 있다
주의할 점은 background-color의 경우 기본값이 transparent이기 때문에, 해당 속성을 기재하지 않아도 투명한 요소로 보이게 된다
- background-image
- 요소의 배경에 하나 이상의 이미지를 삽입
🌟 img 요소가 아닌 요소에서 배경 이미지를 삽입하려면 크기를 지정해주어야 한다!!
- IE8(지금은 당연히 지원x) 이하 버전에서는 호환될 수 없음
- , 로 다수의 이미지를 구분
- 먼저 작성된 이미지가 더 위에 쌓이게 됨
<!DOCTYPE html>
<html lang="en">
<head>
    <meta charset="UTF-8">
    <meta http-equiv="X-UA-Compatible" content="IE=edge">
    <meta name="viewport" content="width=device-width, initial-scale=1.0">
    <title>Document</title>
    <style>
        div{
            width: 500px;
            height: 1000px;
            background-image:url("https://heropy.blog/css/images/vendor_icons/postman.png") ,
            url("https://heropy.blog/css/images/vendor_icons/css3.png"),
            url("https://heropy.blog/css/images/vendor_icons/html5.png");
            background-repeat: no-repeat;
        }
    </style>
</head>
<body>
    <div class="box"></div>
</body>
</html>
background-image 를 이용한 다수 이미지 적용
위와 같이 여러개의 이미지를 적용할 수는 있지만, 먼저 등장한 이미지가 제일 위로 오고 그 다음 이미지는 겹쳐질 수도 있다!
만약 이를 해결하고자 한다면, background-position 속성을 이용하면 겹치는 것을 막아줄 수 있다
https://www.w3schools.com/css/css3_backgrounds.asp
<!DOCTYPE html>
<html lang="en">
<head>
    <meta charset="UTF-8">
    <meta http-equiv="X-UA-Compatible" content="IE=edge">
    <meta name="viewport" content="width=device-width, initial-scale=1.0">
    <title>Document</title>
    <style>
        div{
            width: 1000px;
            height: 500px;
            background-image:url("https://heropy.blog/css/images/vendor_icons/postman.png") ,
            url("https://heropy.blog/css/images/vendor_icons/css3.png"),
            url("https://heropy.blog/css/images/vendor_icons/html5.png");
            background-repeat: no-repeat;
            background-position:left top, right top,left bottom;
        }
    </style>
</head>
<body>
    <div class="box"></div>
</body>
</html>
background-position을 이용한 다수 이미지 위치 배치를 통한 겹침 현상 방지
- background-repeat
- 배경이미지의 반복을 설정
- 개별 속성
<!DOCTYPE html>
<html lang="ko">
<head>
    <meta charset="UTF-8">
    <meta http-equiv="X-UA-Compatible" content="IE=edge">
    <meta name="viewport" content="width=device-width, initial-scale=1.0">
    <title>Document</title>
    <style>
        .box{
            width: 1000px;
            height: 600px;
            background-image:url("https://heropy.blog/css/images/logo.png");
            border:3px solid red;
            border-radius: 10px;
            display:flex;
            justify-content: center;
            align-items: center;
            color:blue;
            font-weight: bold;
            font-size:35px;
        }
        .box2{
            background-repeat:repeat-x;
        }
        .box3{
            background-repeat: repeat-y;
        }
        .box4{
            background-repeat: no-repeat;
        }
    </style>
</head>
<body>
    <div class="box1 box">repeat</div>
    <div class="box2 box">repeat-x</div>
    <div class="box3 box">repeat-y</div>
    <div class="box4 box">no-repeat</div>
</body>
</html>


위와 같이, background-repeat 속성을 확인해보기 위해서
- background-repeat 속성을 지정하지 않은 경우
- background-repeat:repeat-x 속성을 지정한 경우
- background-repeat:repeat-y 속성을 지정한 경우
- background-repeat:no-repeat 속성을 지정한 경우
에 대해서 확인해본 결과, 앞서 확인한 것처럼 기본값이 repeat이기 때문에 첫번째 경우에는 수평, 수직 방향으로 이미지가 반복됨을 확인해볼 수 있다
그리고 두번째와 세번째는 각각 수평/수직 방향으로 이미지가 반복됨을 확인해볼 수 있다
마지막 경우에는 그 어떤 방향으로도 이미지가 반복되지 않음을 확인해볼 수 있다
- background-position
- 배경 이미지의 위치를 지정하는 개별 속성
<!DOCTYPE html>
<html lang="ko">
<head>
    <meta charset="UTF-8">
    <meta http-equiv="X-UA-Compatible" content="IE=edge">
    <meta name="viewport" content="width=device-width, initial-scale=1.0">
    <title>Document</title>
    <style>
        .box{
            width: 700px;
            height: 600px;
            background-image:url("https://heropy.blog/css/images/logo.png");
            background-repeat: no-repeat;
            background-position: 100px 400px;
            background-size:100px 100px;
            border:3px solid red;
            border-radius: 10px;
            display:flex;
            justify-content: center;
            align-items: center;
            color:blue;
            font-weight: bold;
            font-size:35px;
        }
    </style>
</head>
<body>
    <div class="box">no-repeat</div>
</body>
</html>

background-position
위의 경우에서 확인해볼 수 있는 것처럼, background-position은 top bottom left center right의 방향 혹은 단위로 지정, 표시될 수 있다!(background 단축속성과는 다르게!) 즉, 상 하 좌 우 정중앙 왼쪽상단 왼쪽가운데 왼쪽아래 가운데윗부분 가운데아랫부분 오른쪽상단 오른쪽가운데 오른쪽아랫부분 과 같은 의미상 위치뿐 아니라, x축방향으로는 어느정도 y축 방향으로는 어느만큼 left top에서부터 떨어졌는지 지정하여 표시할 수 있다
[USAGE]
(1) 값이 방향인 경우
background-position: 방향1 방향2;
(2) 값이 단위(%, px 등)인 경우
background-position: x축 y축;
🌟(3)방향과 단위를 혼재하여 사용할 수 있다. 다만 순서는 아래와 같이 꼭 지켜서 적어주어야 한다
background-position: 단위 방향;
-이때 단위는 x축 방향, 방향은 y축 방향으로의 의미로 사용될 것
- background-attachment
- 요소가 스크롤될 때 배경 이미지의 스크롤 여부(특성) 설정
- 개별 속성
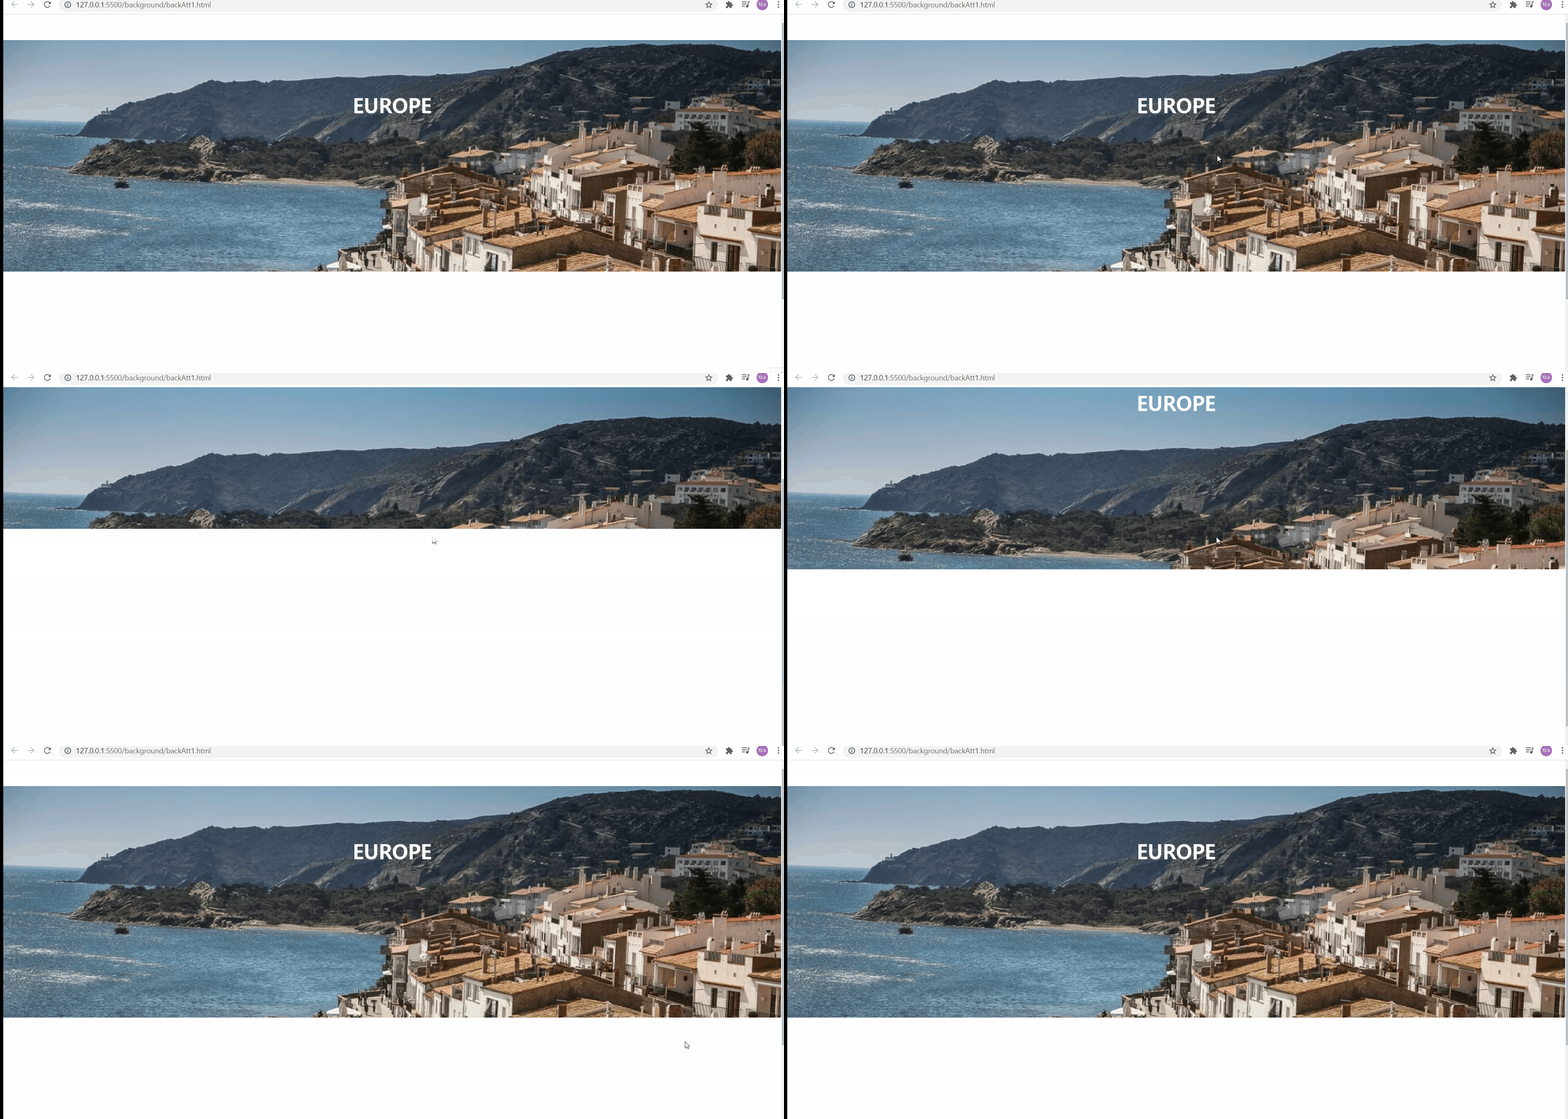
먼저 속성값 중 가장 궁금한 fixed를 확인해보자
가장 궁금했던 이유는 최근 보았던 (링크를 저장하지 않았다..😭) 페이지에서 이런 움직임이 재밌어 보였기 때문이다
<!DOCTYPE html>
<html lang="ko">
<head>
    <meta charset="UTF-8">
    <meta http-equiv="X-UA-Compatible" content="IE=edge">
    <meta name="viewport" content="width=device-width, initial-scale=1.0">
    <title>Document</title>
    <style>
        *{
            padding:0;
            margin:0;
        }
        body{
            background-image: url("https://cdn.pixabay.com/photo/2015/07/09/23/09/cadaques-838724_960_720.jpg");
            background-size:cover;
            background-repeat: no-repeat;
            background-attachment: fixed;
        }
        .box{
            background-color: white;
            width: 100%;
        }
        .box1{
            height: 50px;
            margin-bottom:100px;
        }
        p{
            text-align: center;
            color:white;
            font-weight: bold;
            font-size:40px;
            margin-bottom:300px;
        }
        .box2{
            height: 500px;
        }
    </style>
</head>
<body>
    <div class="box box1"></div>
    <p>EUROPE</p>
    <div class="box box2"></div>
</body>
</html>

background-attachment:fixed
지금 연습해본 것은, 그 때 보았던 사이트들에서 스크롤을 내릴 때 뒤에 보여지는 이미지는 그대로 채 컨텐츠가 그 위에 존재하여 확인하는(?) 그런 재미있는 느낌을 내본 것이다
마치 하나의 액자처럼, 배경 전체를 이미지가 다 채우도록 한 후 그 위에 간단한 제목과 두 개의 상자를 배치해보았다. 그 다음에 background-attachment:fixed를 배경에 적용해보았더니, 배경은 움직이지 않는 듯한 모습으로 보인다!
그 다음은 scroll을 보게 될 텐데 이는 해당 속성을 지정하지 않아도 자동으로 기본값으로 부여된다
local 속성과의 차이점은
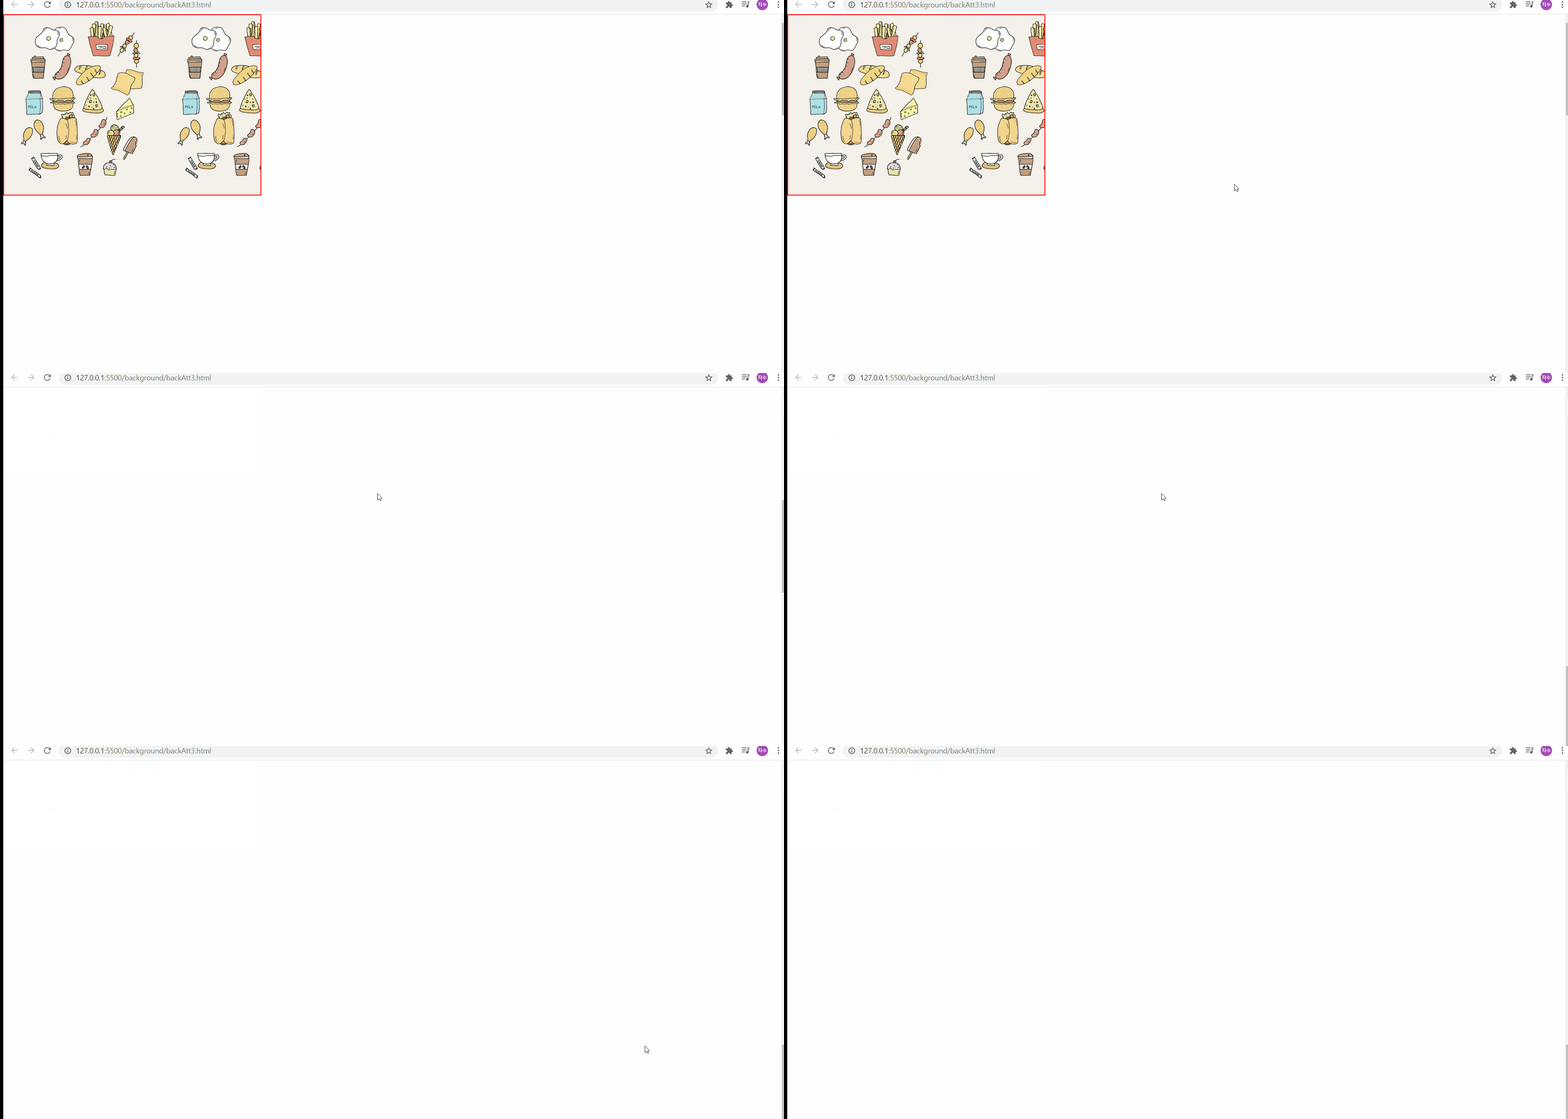
- scroll은 해당 영역 내에서 스크롤하면 마치 이미지는 고정되어 있고 스크롤만 되는 듯한 느낌이 있다
- local은 해당 영역 내에서 스크롤하게 되면, 그 영역 내에서 스크롤되면서 이미지도 따라가는 특성이 있다
<!DOCTYPE html>
<html lang="ko">
<head>
    <meta charset="UTF-8">
    <meta http-equiv="X-UA-Compatible" content="IE=edge">
    <meta name="viewport" content="width=device-width, initial-scale=1.0">
    <title>Document</title>
    <style>
        *{
            padding:0;
            margin:0;
        }
        body{
            height: 3000px;
        }
        .box{
            width: 500px;
            height: 350px;
            border:2px solid red;
            background-image: url(https://cdn.pixabay.com/photo/2020/09/02/08/19/dinner-5537679__340.png);
        }
    </style>
</head>
<body>
    <div class="box"></div>
</body>
</html>

background-attachment:scroll
위와 같이 scroll값을 부여하면 화면과 이미지가 같이 움직이게 된다
밑의 local에서 더 자세히 살펴보자
.
<!DOCTYPE html>
<html lang="ko">

<head>
    <meta charset="UTF-8">
    <meta http-equiv="X-UA-Compatible" content="IE=edge">
    <meta name="viewport" content="width=device-width, initial-scale=1.0">
    <title>Document</title>
    <style>
        * {
            padding: 0;
            margin: 0;
        }

        body {
            background: whitesmoke;
        }

        canvas {
            margin-bottom: 50px;
            background-attachment: local;
        }

        .container {
            background-image: url(https://heropy.blog/css/images/logo.png);
            width: 400px;
            height: 300px;
            margin:50px;
            background-attachment: scroll;
            background-size:50%;
            overflow:auto;
            border:3px solid red;
        }
        .for-scroll{
            height: 2000px;
        }
        /* canvas:nth-child(2n+1){
            background-image: url(https://cdn.pixabay.com/photo/2021/06/11/14/01/sea-6328687__340.jpg);
        } */
    </style>
</head>
<body>
    <canvas class="can1"></canvas>
    <canvas class="can2"></canvas>
    <canvas class="can3"></canvas>
    <div class="container">
        <div class="for-scroll"></div>
    </div>
    <script>
        const canvas = document.getElementsByTagName("canvas");
      //  console.log(canvas);

        function init() {
            for(let i = 0 ; i < canvas.length; i++){
                const ctx = canvas[i].getContext("2d");

                ctx.fillStyle="orange";
                    ctx.fillRect(100+(i*5),100+(i*5),100,100);
            }
        }

        init();

    </script>
</body>

</html>

background-attachment:local
위의 예시에서 보다 분명하게 알 수 있는 것은,
- local은 영역 내에서 스크롤과 함께 이미지가 같이 움직이고
- scroll은 영역 내에서 이미지는 고정되어 있지만, fixed와 다르게 계속해서 동일한 화면만 보여준다는 점이고, 스크롤은 계속해서 진행된다
라는 특징이다
- background-size
- 배경 이미지의 크기를 지정
- contain은 짧은 너비에 맞춰지지만 이미지가 잘리지 않아서 빈 공간이 존재할 수 있다는 단점이 존재한다!
<!DOCTYPE html>
<html lang="ko">
<head>
    <meta charset="UTF-8">
    <meta http-equiv="X-UA-Compatible" content="IE=edge">
    <meta name="viewport" content="width=device-width, initial-scale=1.0">
    <title>Document</title>
    <style>
        .box{
            width: 300px;
            height: 200px;
            border:2px solid red;
            margin:50px;
            background-image:url(https://heropy.blog/css/images/logo.png);
            background-size:100px 100px;
        }
    </style>
</head>
<body>
    <div class="box"></div>
</body>
</html>

background-size 속성
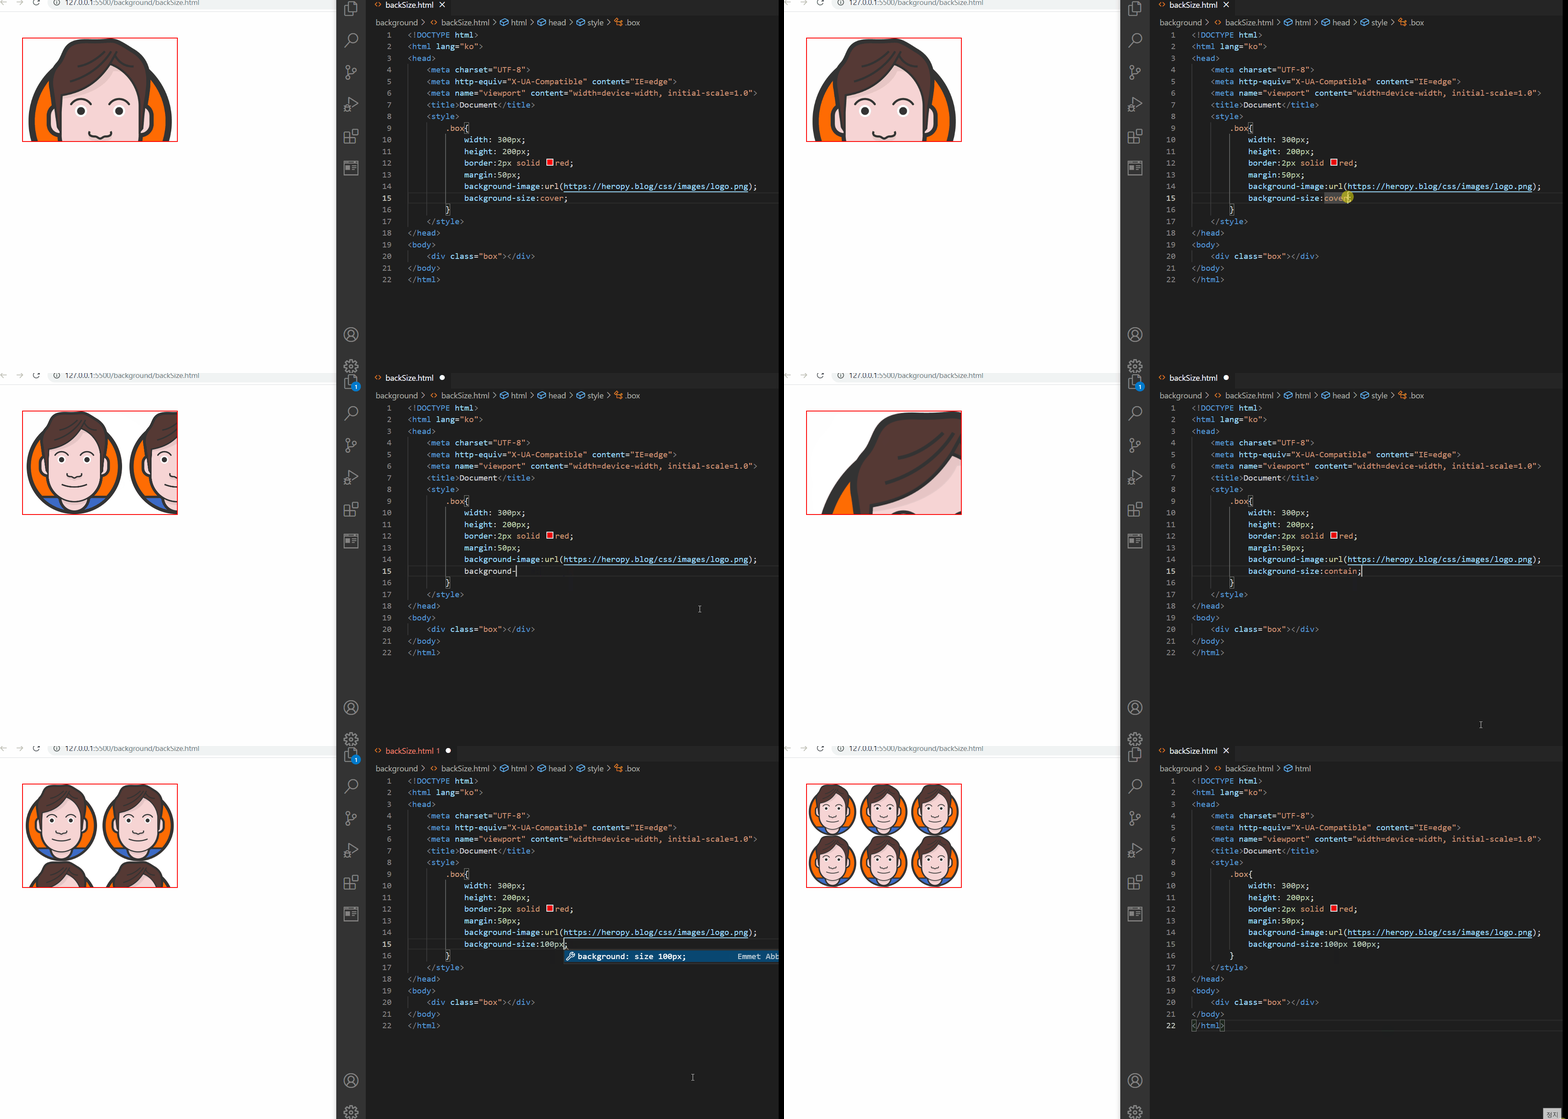
위에서 볼 수 있듯이, 기본값이 auto이기 때문에 굳이 이 속성을 넣지 않더라도 원본 크기를 보여주는 auto 값을 확인해볼 수 있다
그리고 지금 box의 가로가 300, 세로가 200으로 가로가 더 긴 상태이다
따라서 cover를 지정하면 가로를 우선으로 이미지가 보이게 되어서 세로 일부는 잘리게 될것이다
contain을 지정하면 세로를 우선으로 배치되려고 하고 이미지가 잘리지 않게 하려고 하지만 repeat 속성으로 인하여 상자 크기를 벗어나면서 잘린 것처럼 보이게 된다(no-repeat 지정시에는 빈 공간이 있는 것처럼 보인다)
그리고 %, px 등 단위를 이용해서 이미지 크기를 지정하여 보여줄 수도 있다
🌟 img 요소에서 언급했던 것처럼, 이미지는 일정 비율이 있기 때문에 가로너비만 지정해주면 비율이 뭉그러지지 않은 채 리사이즈될 수 있다!